
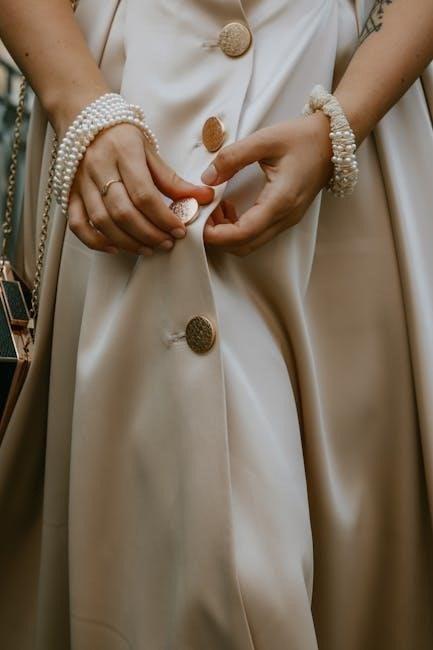
Tila bead bracelets are a popular DIY craft, offering versatility and creativity. With simple materials like elastic cord and Miyuki beads, anyone can create stylish, customizable designs.
What Are Tila Beads?
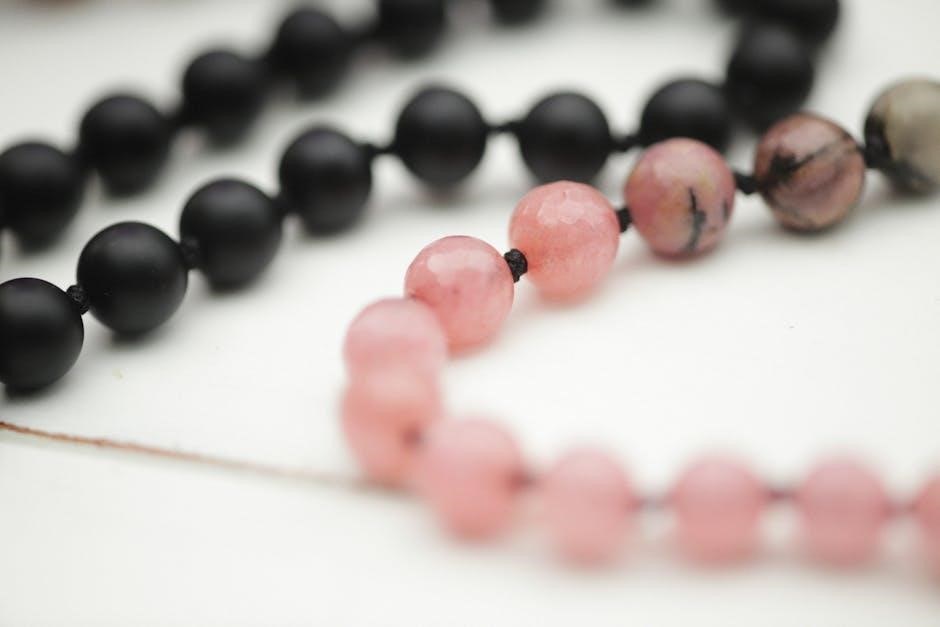
Tila beads, also known as Miyuki beads, are small, flat, square-shaped beads with two holes. Measuring 5mm x 5mm, they come in various colors and finishes. Their dual-hole design allows for creative patterns like herringbone or zigzag. Popular in jewelry making, Tila beads are versatile for bracelets, anklets, and more, offering endless design possibilities for crafters.
Popularity of Tila Bead Jewelry
Tila bead jewelry has gained significant popularity due to its versatility and trendy appeal. Crafters and jewelry enthusiasts love how Tila beads can be styled in various ways, from simple single-wrap designs to intricate multi-row patterns. Their flat shape and dual-hole design make them ideal for creating stackable, stretchy bracelets that are both fashionable and easy to wear. Additionally, Tila beads are a favorite in DIY communities, with many tutorials and workshops dedicated to their use. Their availability in diverse colors and finishes also allows for personalized designs, making Tila bead jewelry a must-have accessory for many.
Why Make a Tila Bead Bracelet?
Creating a Tila bead bracelet is a rewarding DIY project that allows for personal expression and creativity. It’s an excellent way to explore your artistic side while crafting a unique accessory. Tila beads are easy to work with, making this project accessible to both beginners and experienced crafters. The process is therapeutic and relaxing, offering a fun way to unwind. Additionally, handmade bracelets make thoughtful gifts, showing care and effort. With customizable designs, you can tailor the bracelet to match personal styles or special occasions, making each piece truly one-of-a-kind and meaningful.

Materials Needed for a Tila Bead Bracelet
Gather essential supplies like Tila beads, elastic cord, scissors, clear nail polish, and an optional beading needle for a smooth crafting experience.
Tila Beads (Miyuki Beads)
Tila beads, also known as Miyuki beads, are small, flat, square-shaped beads measuring 5mm x 5mm. They feature two holes, allowing for versatile threading and stitching patterns. Available in various colors and finishes, Tila beads are ideal for creating intricate designs. Their dual-hole design makes them perfect for bead weaving techniques like herringbone or diagonal stitches. When using Tila beads, it’s recommended to thread elastic cord through the upper hole first, ensuring a secure and balanced bracelet. Their popularity stems from their modern aesthetic and adaptability in jewelry-making projects, making them a favorite among DIY enthusiasts and professional beaders alike.
Elastic Cord or Stretch Cord
Elastic cord or stretch cord is a key material for making Tila bead bracelets, as it allows the bracelet to stretch and fit comfortably around the wrist. Typically, two pieces of elastic cord, each around 15 inches long, are recommended to ensure enough length for threading and tying knots. The stretchiness of the cord makes it easy to slide the bracelet on and off while maintaining a secure fit. When cutting the cord, leave extra length to accommodate knot-tying and trimming. Using high-quality elastic cord ensures durability and prevents breakage. This material is essential for creating adjustable, one-size-fits-all Tila bead bracelets.
Scissors
Sharp scissors are essential for cutting elastic cord and trimming excess thread when making a Tila bead bracelet. Dull scissors can fray the elastic, making it difficult to work with and potentially leading to uneven cuts. It’s important to use dedicated scissors for beading to ensure clean, precise cuts. After threading the beads, scissors are used to trim the excess cord close to the knot, ensuring a professional finish. Having a pair of sharp, dedicated scissors on hand will make the process smoother and help achieve a neat, polished bracelet. This tool is indispensable for any Tila bead bracelet project.
Clear Nail Polish
Clear nail polish is a crucial tool for securing knots in Tila bead bracelets. After tying the final knot, apply a small drop of clear nail polish to seal it, preventing the elastic cord from unraveling. This step ensures the bracelet’s durability and longevity. The polish dries quickly, leaving a hard, protective layer that safeguards the knot from wear and tear. It’s an inexpensive yet effective way to add a professional finish to your handmade jewelry. Always use a clear, non-yellowing polish to maintain the bracelet’s aesthetic appeal and ensure it remains secure for years to come.
Optional: Beading Needle
A beading needle can be a helpful tool when working with Tila beads, especially for more intricate designs or patterns. While not essential for basic bracelets, it aids in threading beads onto the elastic cord, particularly when working with multiple strands or complex stitches. The needle’s slim design allows for precise control, making it easier to weave through beads or adjust their placement. For beginners, it can simplify the process of handling small beads and ensuring they are properly aligned. However, many crafters successfully make Tila bead bracelets without one, relying instead on patience and careful threading by hand.

Basic Techniques for Tila Bead Bracelets
Mastering basic techniques is essential for creating durable and stylish Tila bead bracelets. Start by cutting the elastic cord to the desired length, ensuring it’s long enough to wrap around your wrist with some extra for tying knots. Next, secure one end with a knot and apply clear nail polish to prevent it from coming undone. Thread the Tila beads onto the cord, arranging them in your desired pattern. Once all beads are in place, tie another knot at the end and seal it with nail polish for added security. These simple steps form the foundation of any Tila bead bracelet design.
Cutting the Elastic Cord
Cut two 15-inch pieces of elastic cord for a standard bracelet. This length ensures enough material to thread beads and tie knots comfortably. For a triple-wrap style, increase length accordingly. Always use sharp scissors to prevent fraying the cord, as frayed ends can make threading beads difficult. Cutting accurately ensures the bracelet fits properly without excess cord. Proper cord length is key to achieving the desired wrap style and ensuring comfort. Measure carefully to avoid re-cutting, saving time and material. This step sets the foundation for a well-crafted Tila bead bracelet, making it essential to get it right from the start.
Tying a Knot at the End
Tying a knot at the end of the elastic cord is crucial to secure the beads and prevent them from falling off. To start, hold the elastic cord and create a small loop at the end. Pass the other end of the cord through this loop to form a knot. For added security, consider tying a double knot. Once the knot is tied, apply a small drop of clear nail polish to reinforce it, ensuring it doesn’t come undone over time. Allow the polish to dry completely before threading the beads. Keep the knot as small as possible to maintain comfort and aesthetics. Practicing on a separate piece of cord can help perfect the technique.
Securing the Knot with Nail Polish
After tying the knot at the end of the elastic cord, apply a small drop of clear nail polish directly onto the knot. This step is essential to prevent the knot from coming undone over time. Gently spread the polish evenly around the knot using the brush. Allow it to dry completely, which typically takes a few minutes. Once dry, the knot will be securely sealed, adding durability to your bracelet. Avoid applying too much polish, as it may create a bulky appearance. This simple technique ensures your bracelet remains intact and lasts longer, even with frequent wear. Proper drying is key for effectiveness.
Threading Tila Beads
Threading Tila beads is a straightforward process that requires attention to detail. Begin by holding the elastic cord and carefully inserting one end through one of the two holes in the Tila bead. Gently pull the cord through to ensure the bead sits securely. Repeat this process for each bead, aligning them in your desired pattern. For designs requiring multiple strands, thread the cord through both holes to create a more intricate look; Maintain consistent tension while threading to prevent beads from shifting. This method ensures a neat and professional finish, making your bracelet both stylish and durable. Proper threading is crucial for a polished appearance.
Design Ideas and Patterns
Explore various styles like single, double, or triple wrap bracelets. Try herringbone, zigzag, or stackable designs for unique looks. Customize with charms or holiday themes for personal flair.
Single Wrap Tila Bead Bracelet
A single wrap bracelet is a simple yet elegant design. Cut a 12-inch elastic cord, thread Tila beads, and secure with a knot. Add nail polish to prevent fraying.
Double Wrap Tila Bead Bracelet
The double wrap bracelet adds a touch of sophistication. Use two strands of elastic cord, each 15 inches long, to create a fuller look. Thread Tila beads on both strands, then tie them together, securing with nail polish for durability.
Triple Wrap Tila Bead Bracelet
A triple wrap bracelet offers a bold and stylish look. Cut three strands of elastic cord, each slightly longer than needed. Thread Tila beads onto all strands, ensuring alignment for a cohesive design. Tie a secure knot at the end, using nail polish to reinforce it. This method creates a thicker, more elaborate bracelet perfect for making a statement. The triple wrap design allows for creative patterns and color combinations, making it a versatile accessory for any occasion.
Herringbone Pattern
The herringbone pattern is a popular choice for Tila bead bracelets, offering a sleek, textured design. To create this pattern, thread Tila beads onto the elastic cord in an alternating, zigzag manner. Sew through the beads in opposite directions to secure them, forming the classic herringbone weave. This technique creates a reversible bracelet with a visually appealing, interlocking design. For best results, use a beading needle to weave the beads tightly and evenly. The herringbone pattern adds sophistication to any Tila bead bracelet, making it a standout accessory for casual or formal wear.
Zigzag Pattern
The zigzag pattern adds a dynamic and playful touch to Tila bead bracelets. To achieve this look, thread Tila beads onto the elastic cord in an alternating, back-and-forth sequence. Start by threading a bead on one side, then cross over to the other side for the next bead, creating a crisscross effect. This pattern works well with two or more strands of beads, and the dual holes in Tila beads help maintain the structure. Secure the beads by sewing through them in alternating directions, ensuring the zigzag design stays intact. The result is a vibrant, eye-catching bracelet perfect for adding personality to any outfit.
Stackable Tila Bead Bracelet
A stackable Tila bead bracelet is a trendy and versatile accessory that allows you to layer multiple bracelets for a stylish look. To create this design, use a single strand or multiple strands of Tila beads threaded onto elastic cord. The stackable effect is achieved by making several individual bracelets with varying patterns or colors and wearing them together. This method is ideal for showcasing different bead combinations or matching outfits. The elastic cord ensures a comfortable fit, while the Tila beads add a modern, sleek appearance. Stackable bracelets are perfect for personalizing your jewelry collection or gifting to others.

Advanced Techniques for Tila Bead Bracelets
Explore intricate patterns like herringbone and diagonal stitches. These advanced methods add sophistication to your designs, offering versatility and unique visual appeal for experienced crafters.
Bead Weaving with Tila Beads
Bead weaving with Tila beads offers a creative way to craft intricate designs. Using a needle and thread, weave beads into complex patterns like the herringbone or diagonal stitch. Start by threading the beads and securing them with knots. Practice basic stitches before moving to advanced patterns. This technique allows for multi-dimensional designs, making each bracelet unique. With patience, you can create professional-looking pieces that stand out. Bead weaving is perfect for those who enjoy detailed, artistic jewelry-making projects. It’s a great way to elevate your Tila bead creations and explore new design possibilities.

Diagonal Stitch Pattern
The diagonal stitch pattern is a popular technique for Tila bead bracelets, creating a dynamic, zigzag design. Start by threading a Tila bead and sewing through neighboring beads diagonally. This stitch works well with Tila beads due to their two-hole design. To secure, sew through beads in alternating directions, forming a crisscross pattern. The diagonal stitch adds texture and visual interest to your bracelet. It’s ideal for those who enjoy geometric designs. Practice this stitch to master its rhythm and flow, ensuring beads align neatly. With consistent tension, this pattern creates a professional-looking piece perfect for everyday wear or gifting.

Adding Multiple Rows
Adding multiple rows to your Tila bead bracelet enhances its visual appeal and complexity. Start by completing the first row using your preferred pattern. To add subsequent rows, thread your elastic cord through the second hole of the last bead in the previous row. This ensures alignment and stability. Repeat your chosen pattern, sewing through corresponding beads in the new row. Maintain consistent tension to prevent the bracelet from becoming too loose or tight. Multiple rows create a vibrant, layered effect, perfect for showcasing different bead colors or patterns. This technique allows for endless creativity, making each bracelet uniquely personalized and eye-catching.
Tips for Success
Secure knots with clear nail polish, use the right cord length, and maintain even tension. Ensure beads align properly and are tightly secured for a professional finish.
Securing the Final Knot
To ensure your Tila bead bracelet is durable, securing the final knot properly is essential. Tie a tight knot at the end of the elastic cord, leaving a small loop for the beads to pass through; Apply clear nail polish to the knot to prevent it from coming undone over time. Allow the polish to dry completely before handling the bracelet. For added security, you can also tie multiple knots and trim the excess cord close to the bead. This ensures a professional finish and prevents breakage, making your bracelet long-lasting and secure to wear. Proper knotting is key to a successful design.
Preventing Breakage
To prevent breakage, use high-quality elastic cord and avoid overstretching the bracelet. Secure the final knot with clear nail polish and consider using two strands of cord for added strength. When threading beads, ensure they are evenly spaced and not too tight, as this can cause tension. Handle the bracelet gently and avoid pulling it excessively. Store the bracelet separately from other jewelry to prevent tangling or stress. Regularly inspect the cord and knots for wear. By taking these precautions, you can extend the life of your Tila bead bracelet and enjoy it for years to come.

Using the Right Length of Cord
Using the correct length of elastic cord is crucial for a comfortable and durable Tila bead bracelet. A standard recommendation is to cut two 15-inch pieces of cord, as this provides ample length for threading beads and tying knots. The extra length allows for easy handling and minimizes the risk of breakage. For single-wrap bracelets, 15 inches is sufficient, while double or triple wraps may require slightly more. Ensure the cord is not too tight, as this can cause discomfort. After completing the bracelet, trim the excess cord close to the knot and secure it with clear nail polish for a professional finish.

Troubleshooting Common Issues
Common issues include broken bracelets, uneven tension, and misaligned beads. Reinforce knots with nail polish, adjust cord length, and ensure proper bead alignment for durability.
Fixing a Broken Bracelet
If your Tila bead bracelet breaks, start by identifying the point of damage. Cut a new piece of elastic cord slightly longer than the original. Thread the cord through the beads, ensuring they align properly. Tie a secure knot at one end and apply clear nail polish to reinforce it. Repeat on the other end. For added strength, weave the cord through the beads in the same pattern as before. Let the polish dry completely before wearing. This method restores the bracelet’s integrity and prevents further breakage. Regular inspections and gentle handling can extend its lifespan.
Adjusting the Tension
To ensure your Tila bead bracelet fits perfectly, proper tension is crucial. Measure your wrist to determine the ideal length, leaving a little slack for comfort. When threading beads, avoid pulling the cord too tightly, as this can cause the bracelet to feel restrictive. If the bracelet feels too loose, gently pull the cord tighter before securing the knot. After tying the final knot, apply clear nail polish to prevent it from coming undone. This ensures the bracelet stays secure without being overly tight. Adjusting the tension correctly ensures a comfortable, long-lasting wear.
Dealing with Bead Alignment
Proper bead alignment is essential for a polished Tila bead bracelet. Start by threading beads in a consistent pattern, ensuring each bead sits flat and aligns with the others. If beads shift out of place, gently nudge them back into position while the cord is still slightly loose. For intricate designs like herringbone or zigzag patterns, use a bead mat or surface to keep beads organized. After securing the final knot, inspect the bracelet and adjust any misaligned beads. This attention to detail ensures a professional finish and enhances the overall appearance of your handmade jewelry.
Project Variations
Expand your creativity by exploring unique Tila bead projects, such as customizing with charms, creating holiday-themed bracelets, or crafting elegant anklets for added style and versatility.
Customizing with Charms
Add a personal touch to your Tila bead bracelet by incorporating charms. Begin by threading a charm onto the elastic cord before or after adding Tila beads. For a balanced look, space charms evenly between beads or group them together for a focal point. Use a variety of themed charms, such as hearts, stars, or seasonal symbols, to match your style or occasion. Secure the charm by tying a knot on either side or using clear nail polish to prevent it from sliding. This technique also works for anklets, allowing you to create unique, personalized jewelry pieces with ease.
Creating Holiday-Themed Bracelets
Holiday-themed Tila bead bracelets are a fun and festive way to celebrate special occasions. Start by selecting Tila beads in holiday colors, such as red and green for Christmas or pastels for Easter. Thread the beads onto elastic cord, using patterns like zigzag or herringbone for visual interest. Enhance the design by adding holiday-themed charms, such as snowflakes, hearts, or pumpkins. Secure the ends with a knot and clear nail polish. These bracelets make great gifts and can be easily customized to match the recipient’s style. With minimal materials, you can create stylish, themed jewelry for any holiday celebration.
Making Tila Bead Anklets
Making Tila bead anklets is similar to crafting bracelets but with a few adjustments. Begin by cutting a stretch cord slightly longer than the desired anklet length, typically around 10-12 inches. Thread Tila beads in your preferred pattern, using techniques like the herringbone or diagonal stitch. For a delicate look, use single strands, or stack beads for a bolder style. Secure the ends with a knot and clear nail polish. Anklets are a great way to add subtle elegance to any outfit. Customize with charms or beads to match your personal style for a unique accessory.
Creating Tila bead bracelets is a rewarding craft that sparks creativity and relaxation. With simple steps, you can craft unique, stylish accessories to enjoy or share with others.
Final Thoughts on Making Tila Bead Bracelets
Creating Tila bead bracelets is a fulfilling and creative endeavor, offering endless possibilities for personalization. Whether you’re crafting a simple single-wrap design or an intricate herringbone pattern, the process is both relaxing and rewarding. With basic materials like elastic cord, scissors, and Miyuki beads, anyone can dive into this craft. Experimenting with colors, patterns, and techniques allows you to express your unique style. The portability of the project makes it ideal for crafting on the go. Remember to use clear nail polish to secure knots and prevent breakage. Most importantly, enjoy the journey of making something beautiful to wear or share with others.