Welcome to the world of Plantronics headsets‚ designed for exceptional audio quality‚ comfort‚ and durability. This manual guides you through setup‚ features‚ and troubleshooting for optimal performance.
1.1 Key Features and Components
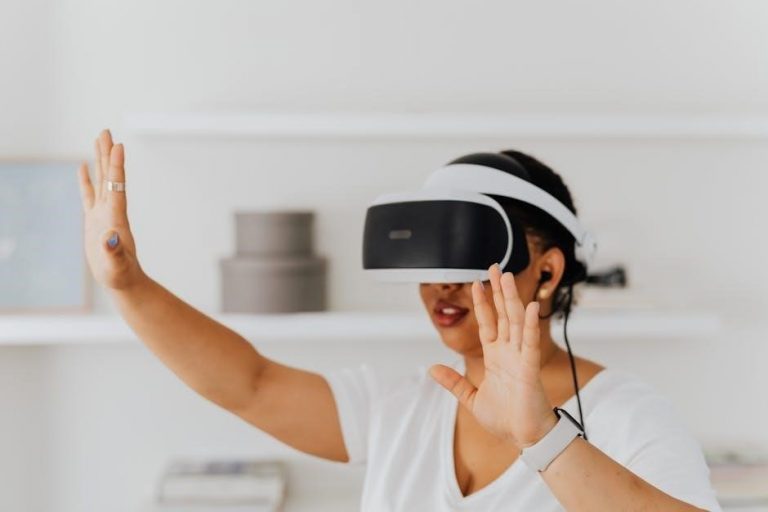
Plantronics headsets are equipped with advanced features for seamless communication. Key components include high-quality speakers‚ noise-canceling microphones‚ and intuitive controls for volume adjustment. Many models offer wireless connectivity via DECT or Bluetooth‚ ensuring freedom of movement. The headsets feature durable designs‚ comfortable ear cushions‚ and adjustable headbands for long-lasting wear. Advanced audio technologies‚ such as wideband audio‚ enhance call clarity. Additional components include charging cradles‚ USB connectors‚ and battery covers. Some models also support customizable settings via the Plantronics Hub software. With focus on user comfort and audio performance‚ these headsets are designed to meet the needs of both professionals and casual users.
Setting Up Your Plantronics Headset
Unbox and charge your headset‚ then pair it with your device for a seamless connection; Follow the included guide for step-by-step instructions to get started quickly.
2.1 Unboxing and Initial Setup
Unbox your Plantronics headset carefully‚ ensuring all components are included. Charge the headset using the provided USB connector or charging cradle for at least 30 minutes before first use. Locate the charging port‚ typically found on the headset or in the case. Plug the connector into a power source and allow the battery to charge fully for optimal performance. Once charged‚ place the headset in the cradle to ensure proper alignment. Press down gently to secure it. The LED indicator will show charging status. Allow the headset to charge completely before pairing or using it for the first time.
2.2 Charging the Headset
To charge your Plantronics headset‚ insert the USB connector into a power source and place the headset in the charging cradle. The LED will indicate charging status. Charge for at least 30 minutes before first use and ensure it reaches full charge for optimal performance. Avoid overcharging to maintain battery health. The charging time varies by model‚ typically 1-2 hours for a full charge. Use only the provided charger to prevent damage. Once fully charged‚ the LED will turn off or change color‚ indicating readiness for use. Proper charging ensures extended battery life and reliable operation.
2.3 Pairing the Headset with Your Device
To pair your Plantronics headset‚ ensure it is in pairing mode by holding the call button until the LED flashes. On your device‚ enable Bluetooth and search for available devices. Select your headset from the list. If prompted‚ enter the default passcode (0000 or 1234). Pairing is complete when the LED stops flashing. For advanced pairing‚ use the Plantronics Hub app to customize settings. Ensure your device supports the headset’s Bluetooth version for optimal connectivity. If issues arise‚ restart both devices or clear previous pairings. This ensures a stable and secure connection for seamless communication.

Operating Your Plantronics Headset
Mastering your Plantronics headset is simple. Use the call button to answer or end calls. Adjust volume with the +/- buttons for optimal audio. Mute calls by pressing the microphone button‚ ensuring clear communication. For advanced features‚ use the Plantronics Hub app to customize settings and enhance your experience. Regularly update firmware for improved performance. Explore voice commands and noise-canceling features to maximize functionality. This section helps you optimize daily use and troubleshoot common issues for seamless communication.
3.1 Making and Receiving Calls
To make a call‚ ensure your headset is paired and connected to your device. Press the call button to initiate or answer a call. Adjust the volume using the +/- buttons for clear audio. To mute‚ press and hold the microphone button until the mute indicator lights up. For incoming calls‚ press the call button to answer or reject. Use voice commands if supported by your device. Ensure the headset is properly charged and paired before making calls. For optimal performance‚ keep the microphone 2-3 cm from your mouth. Troubleshoot call quality by adjusting settings or restarting the headset if needed.
3.2 Adjusting Volume and Settings
Adjust the volume using the +/- buttons on the headset. The LED will flash green for maximum volume and red for minimum. For settings‚ use the Plantronics Hub software to customize audio settings‚ call controls‚ and system updates. Access the hub via USB or Bluetooth connection. Navigate to the settings menu to tweak noise cancellation‚ microphone sensitivity‚ and equalizer preferences. Save changes to optimize audio performance. For advanced adjustments‚ refer to the software guide. Ensure the headset is connected to your device before making changes. Test the settings by making a call to ensure clarity and comfort. Regular updates improve functionality and compatibility.
Advanced Features of Plantronics Headsets
Explore advanced features like noise cancellation‚ customizable settings via Plantronics Hub‚ and integration with apps like Tile for tracking. **b>Enhance your experience with premium audio technology.
4.1 Using the Microphone
The microphone on your Plantronics headset is designed for clear voice capture. Position it 2-3 cm from your mouth for optimal audio quality. For calls‚ ensure the mic is not covered by clothing. Test the microphone by recording a voice clip or making a test call. If using with a softphone‚ adjust the microphone levels in your computer settings. Some models feature a mute button; use it to pause audio during calls. For troubleshooting‚ clean the mic with a soft cloth and ensure it’s free from debris. Refer to the Plantronics Hub app for additional mic settings and customization options.
4.2 Customizing Settings via Plantronics Hub
Plantronics Hub is a powerful software tool that allows you to personalize your headset settings. Download and install the Hub from the official Plantronics website. Once installed‚ connect your headset to the app to access features like equalizer settings‚ noise cancellation‚ and call notifications. Customize audio preferences‚ such as bass or treble levels‚ to enhance your listening experience. You can also configure call handling options‚ like auto-answer or mute alerts. Regularly update your headset firmware through the Hub to ensure optimal performance. Experiment with different settings to tailor your headset to your specific needs for a seamless audio experience. Restart your headset after updates for changes to take effect.

Troubleshooting Common Issues
Identify common issues and resolve them with basic troubleshooting steps. Restart your headset‚ check connections‚ and ensure firmware is updated. For detailed solutions‚ refer to specific sections.
5.1 Resolving Connectivity Problems
Connectivity issues with your Plantronics headset can often be resolved by restarting the device or ensuring proper pairing. Check that the headset is fully charged and within range of your connected device. Verify that Bluetooth is enabled on both the headset and the device. If problems persist‚ reset the connection by turning Bluetooth off and on again. For wired connections‚ ensure the USB or audio jack is securely plugged in. Update firmware using the Plantronics Hub app. If issues remain‚ consult the user manual for advanced troubleshooting steps or contact Plantronics support for assistance.
5.2 Improving Audio Quality
To enhance audio quality‚ ensure the microphone is positioned correctly and free from obstructions. Adjust the volume using the headset controls or connected device. For optimal sound‚ customize equalizer settings via the Plantronics Hub app. Check for and install firmware updates to improve performance. Background noise can be minimized by enabling noise-cancellation features‚ if available; Ensure the headset is properly charged and paired with the device. If using a wired connection‚ verify the cable is securely plugged in. For wireless headsets‚ maintain a clear line of sight between the headset and the base or connected device to reduce interference.

Safety and Maintenance
Always follow safety guidelines to avoid accidents. Regularly clean the headset with a soft cloth and store it in a dry‚ cool place to maintain performance.
6.1 Safety Precautions
Ensure safe usage by following these guidelines: Avoid exposing the headset to extreme temperatures or moisture. Keep it away from children and pets. Handle electrical components carefully to prevent damage. Do not modify the headset‚ as this may cause malfunctions. Use only original Plantronics accessories to maintain safety and performance. Clean the headset with a soft‚ dry cloth‚ avoiding harsh chemicals. Store the device in a cool‚ dry place when not in use. Follow all local regulations and safety standards. Refer to the separate safety instructions booklet for detailed precautions to ensure optimal and secure operation of your Plantronics headset;
6.2 Cleaning and Storing the Headset
Regularly clean your Plantronics headset to maintain hygiene and performance. Use a soft‚ dry cloth to wipe down the ear cushions‚ headband‚ and microphone. For stubborn stains‚ lightly dampen the cloth with water‚ but avoid harsh chemicals or excessive moisture. Store the headset in a cool‚ dry place‚ away from direct sunlight and extreme temperatures. Use the provided charging cradle or a protective case to prevent damage. Ensure the headset is completely dry before storing to prevent moisture buildup. Proper care extends the lifespan and ensures optimal audio quality and comfort during use.
Warranty and Support
Plantronics headsets are backed by a warranty covering manufacturing defects. For support‚ visit Plantronics.com or contact their customer service team for troubleshooting‚ repairs‚ or general inquiries.
7.1 Understanding Your Warranty
Your Plantronics headset is protected by a limited warranty covering manufacturing defects for a specified period. This warranty applies to products purchased from authorized retailers and includes repairs or replacements for faulty components. For detailed terms‚ visit Plantronics.com or refer to the warranty documentation provided with your purchase. Keep your proof of purchase handy for warranty claims. Note that the warranty does not cover damage caused by misuse or normal wear and tear. Understanding your coverage ensures you can address any issues promptly and maintain your headset’s performance over time.
7.2 Contacting Plantronics Support
For assistance with your Plantronics headset‚ visit the official Plantronics support website. You can access regional support pages for localized help. Use the live chat feature or submit a support ticket for prompt assistance. Phone support is also available in select regions. Before contacting support‚ ensure you have your headset model number‚ purchase date‚ and a detailed description of the issue ready. This will help the support team address your concerns efficiently. Additionally‚ you may need to provide proof of purchase for warranty-related inquiries. Plantronics support is here to ensure you get the most out of your headset experience.