
Bathroom plumbing rough-in dimensions are critical for proper fixture installation, ensuring accurate measurements for pipes, drains, and water supply lines to meet local codes and functionality standards.
Overview of Bathroom Plumbing Rough-In
Bathroom plumbing rough-in involves determining the precise dimensions and layout for pipes, drains, and fixtures before installation. This step ensures compliance with local codes and proper functionality. Key measurements include distances from walls to drains, pipe sizing, and placement of supply lines. Accurate rough-in dimensions prevent future issues like leaks or poor drainage. Proper planning also ensures efficient water distribution and waste removal, making it a critical phase in bathroom construction or renovation.
Importance of Accurate Dimensions in Plumbing
Accurate dimensions in plumbing ensure proper fixture installation, prevent leaks, and maintain water flow efficiency. Incorrect measurements can lead to costly rework, poor drainage, and potential water damage. Precise rough-in dimensions also guarantee compliance with local codes and safety standards. They enable optimal placement of pipes and fixtures, reducing the risk of future repairs. This attention to detail ensures a functional, durable, and safe plumbing system for years to come. It’s a cornerstone of successful bathroom construction or renovation projects.

Key Considerations for Bathroom Plumbing Rough-In
Key considerations include adhering to local plumbing codes, proper fixture placement, selecting durable materials, ensuring efficient drainage and venting, and using appropriate tools and expertise for accurate installation.
Standard Dimensions for Common Fixtures
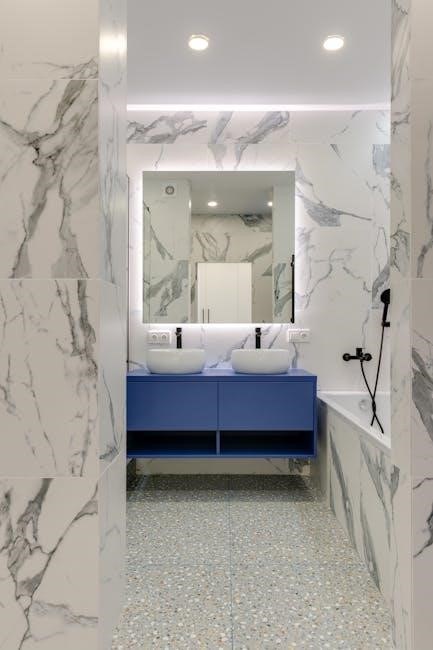
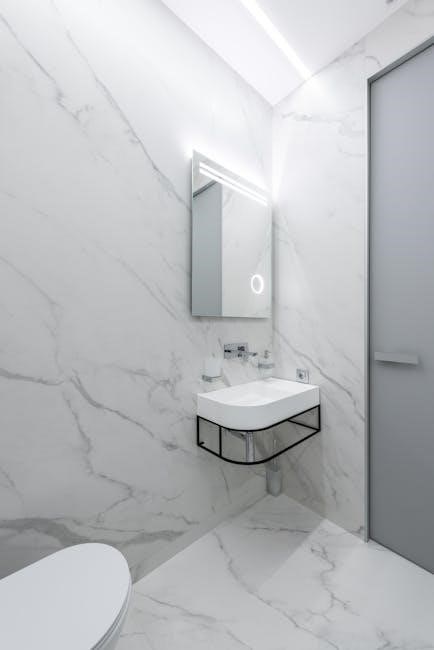
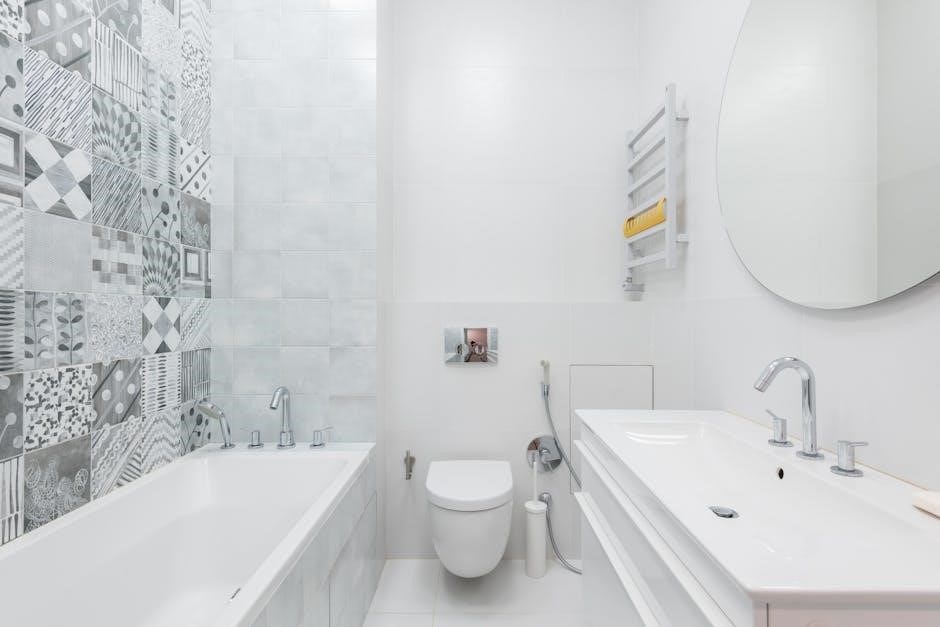
The standard dimensions for common bathroom fixtures are crucial for proper installation and functionality. Toilets typically require a 12-inch rough-in from the wall to the center of the flange, while sinks usually need a 24-inch width and 22-inch depth for vanity installation. Showers and bathtubs vary, but standard shower bases are 36×36 inches, and bathtubs are typically 60 inches long and 30 inches wide. These measurements ensure proper fit and compliance with most plumbing standards for accurate planning and installation.
Materials and Tools Required for Rough-In
For a successful bathroom plumbing rough-in, essential materials include copper pipes, PEX tubing, PVC pipes, fittings (elbows, tees, couplers), shut-off valves, and sealing materials like pipe glue and Teflon tape. Key tools are a pipe cutter, tube bender, adjustable wrench, pipe wrench, drill, level, measuring tape, and pliers. Having these materials and tools ensures efficient installation and helps prevent delays during the rough-in process.
Understanding Local Plumbing Codes and Regulations
Local plumbing codes and regulations dictate specific requirements for bathroom rough-in dimensions, ensuring safety and proper functionality. These codes vary by location and must be adhered to strictly to avoid legal issues. They cover aspects like water supply line placement, drain system configurations, and vent pipe sizing. Consulting local authorities or certified professionals is crucial to ensure compliance. Failure to meet these standards can result in costly rework or system failures. Always verify requirements before starting installation.
Dimensions for Specific Bathroom Fixtures
This section outlines standard rough-in dimensions for toilets, sinks, showers, and bathtubs, ensuring proper installation and functionality. Precise measurements are provided for each fixture type.
Toilet Rough-In Dimensions
The standard toilet rough-in dimension is typically 12 inches from the wall to the center of the toilet flange. This measurement ensures proper installation and alignment. However, it can vary slightly, ranging between 10 to 14 inches, depending on the specific toilet model and local plumbing codes. The water supply line is usually positioned 8 to 10 inches above the floor. Accurate measurements are crucial for a secure and functional installation, preventing future issues like wobbling or poor drainage.
Sink Rough-In Dimensions
The standard sink rough-in dimensions typically include a centerline measurement of 8 to 10 inches from the wall for the drain trap. The water supply lines are usually positioned 6 inches apart and 4 to 6 inches above the floor. These measurements ensure proper installation and functionality. However, dimensions may vary depending on the sink type (e.g., wall-mounted or pedestal) and local plumbing codes. Accurate rough-in dimensions are essential for a leak-free and visually appealing sink installation.
Shower and Bathtub Rough-In Dimensions
Shower and bathtub rough-in dimensions vary based on the fixture type and design. Standard shower stalls typically require a minimum size of 36×36 inches, while larger showers may extend up to 48×48 inches. Bathtubs usually measure 60 inches in length and 30-36 inches in width. Drain placement is critical, often centered 12-18 inches from the wall. Accurate rough-in dimensions ensure proper water flow and prevent issues like pooling or structural damage. Always consult local codes for specific requirements.
Water Closet Rough-In Dimensions
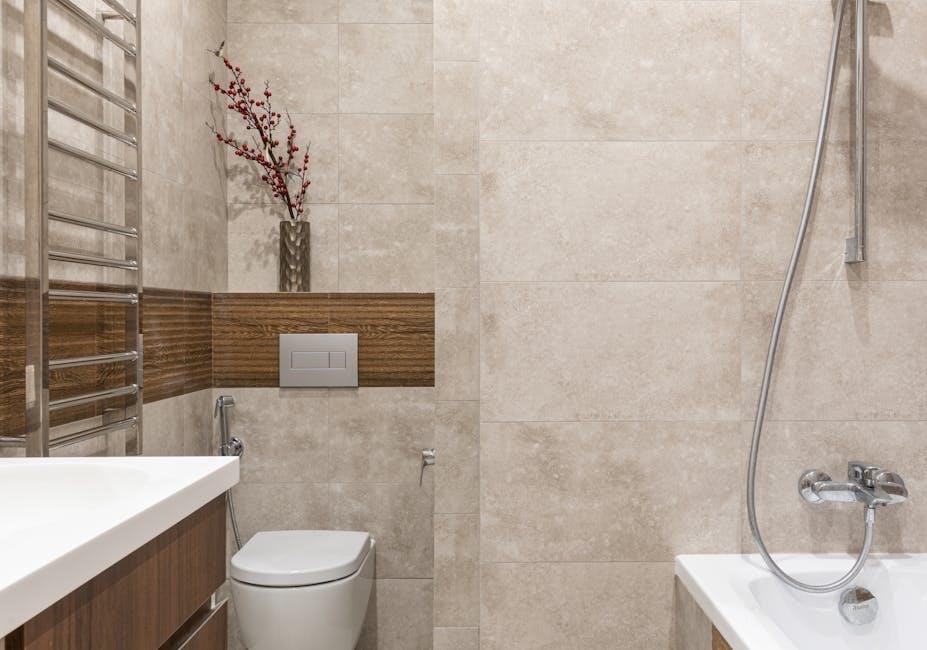
Water closet rough-in dimensions are crucial for proper toilet installation. Standard rough-in measurements typically position the toilet flange 12 inches from the wall, centering the drainpipe. However, some toilets may require 10-inch or 14-inch rough-ins, depending on the model. Ensure compliance with local plumbing codes, which may specify exact requirements. Proper spacing, such as 21 inches of clearance in front and 30 inches of width for accessibility, is essential for functionality and comfort. Accurate measurements prevent installation issues like misalignment or leaks, ensuring a reliable plumbing system.
Drains and Vents in Bathroom Plumbing
Drains and vents ensure proper water flow and prevent sewer gases from entering the bathroom. Correct sizing and placement are vital for functionality and compliance with codes.
Types of Drainage Systems for Bathrooms
Bathroom drainage systems vary based on design and functionality. Gravity-fed systems are the most common, relying on natural flow. Pressure-assisted systems use pumps for efficient drainage in low-slope areas. Greywater systems recycle wastewater for irrigation, reducing water consumption. Each system requires precise sizing and layout to ensure proper flow rates and prevent clogs. Local codes often dictate specific requirements for drainage systems, ensuring safety and efficiency in bathroom plumbing rough-in installations.
Vent Pipe Requirements and Dimensions
Vent pipes are essential for maintaining proper air pressure and preventing siphonage in bathroom plumbing. They must be sized according to local codes, typically 1.5 inches in diameter for residential use. Vent pipes should extend at least 6 inches above the roofline to ensure proper ventilation. Materials like PVC or ABS are commonly used due to their durability and resistance to corrosion. Proper placement and sizing ensure efficient drainage and prevent sewer gases from entering the bathroom.
Drain Pipe Sizing and Layout
Drain pipe sizing depends on the fixture type. Sinks typically use 1.5-inch pipes, showers and bathtubs 2-inch, and toilets 3-inch or 4-inch. Proper layout ensures efficient drainage. The system should slope a quarter inch per foot to prevent clogs. Traps, like P-traps under sinks, block sewer gases. Trap depth varies: 2 inches for sinks, 3-4 inches for toilets. Cleanouts every 50 feet and proper venting maintain airflow. Adherence to local plumbing codes ensures compliance and functionality.
Supply Lines and Water Distribution
Supply lines deliver water to fixtures. Materials like copper, PEX, or PVC are used. Sizes range from 1/2″ to 3/4″. Pressure should be balanced between 40-80 PSI. Proper placement ensures accessibility and functionality, avoiding leaks and damage. Location near fixtures minimizes pressure drops, ensuring efficient water distribution throughout the bathroom system.
Water Supply Line Dimensions and Placement
Water supply lines are sized based on fixture demand. For bathrooms, 1/2″ or 3/4″ lines are common. Placement near fixtures saves space and prevents damage. Typically, lines are routed horizontally or vertically, maintaining 12″ above floors for accessibility. Pressure should be balanced between 40-80 PSI for optimal flow. Proper connections ensure leak-free operation. Always follow local plumbing codes for sizing and placement requirements. Correct installation guarantees efficient water distribution and system longevity.
Common Issues with Supply Line Installation
Common issues include incorrect sizing, leading to low water pressure or reduced flow. Overlooking local plumbing codes can result in non-compliance. Improper connections may cause leaks or water damage. Routing lines too close to heat sources can damage materials. Using incorrect materials for water supply lines can lead to corrosion or leaks. Tight bends or lack of proper support can restrict flow or cause pipe damage. Addressing these issues ensures a reliable and durable plumbing system.
- Incorrect sizing causes pressure issues.
- Overlooking local codes leads to non-compliance.
- Improper connections result in leaks.
- Incorrect materials cause corrosion.
- Tight bends restrict water flow.

Layout and Spacing for Bathroom Fixtures
Proper layout ensures functionality, safety, and comfort. Fixtures like toilets, sinks, and showers must be spaced correctly to meet plumbing codes and accessibility standards.
Key considerations:
- Fixture placement for optimal flow.
- Compliance with local plumbing codes.
- Adequate clearance for accessibility.
Minimum Clearance Requirements
Minimum clearances ensure accessibility and functionality. Toilets require at least 21 inches in front and 12 inches on sides. Sinks need 4 inches from walls, while showers require 36×36 inches. Proper spacing prevents overcrowding and ensures safe access. Local codes often dictate specific measurements for compliance. Maintaining these clearances is vital for both functionality and adherence to safety standards, ensuring a comfortable and accessible bathroom layout.
Optimal Spacing for Functionality and Comfort
Optimal spacing enhances usability and comfort in bathroom design. Toilets should have 24-28 inches of front clearance for legroom, while sinks benefit from 30-36 inches between double basins. Showers require 36×48 inches for easy movement, and bathtubs need 12 inches from walls for safe access. Door placement should allow a 36-inch pathway and avoid obstructing fixtures. Proper spacing ensures a balance between functionality and comfort, making the bathroom user-friendly and enjoyable for all.
Common Mistakes to Avoid
Incorrect measurements, ignoring local codes, and poor pipe sizing are frequent errors. These mistakes can lead to leaks, inefficient drainage, and costly repairs. Proper planning is essential to avoid these issues and ensure a safe, functional bathroom plumbing system.
Mistakes in Measuring and Layout
Incorrect measurements and layout errors are common during bathroom plumbing rough-in. Improper placement of fixtures, such as toilets or sinks, can lead to rework and increased costs. Failure to account for pipe diameters and clearance requirements often results in poorly fitting connections. Additionally, neglecting to double-check the layout against local codes and manufacturer specifications can cause safety hazards and functional issues. Always use precise tools and verify measurements to ensure accuracy and compliance with plumbing standards.
Errors in Pipe Sizing and Material Selection
Incorrect pipe sizing can lead to reduced water pressure or inefficient drainage. Selecting the wrong materials, such as using PVC for hot water lines, can result in premature failure. Always consult local codes and manufacturer guidelines to ensure compatibility and durability. Proper sizing and material selection are critical to avoid leaks, corrosion, and system inefficiencies. Double-check specifications to prevent costly repairs and ensure long-term reliability in your bathroom plumbing system.
Best Practices for Bathroom Plumbing Rough-In
Plan meticulously, adhere to local codes, and ensure accurate pipe sizing and material selection for a successful bathroom plumbing rough-in. This ensures functionality, safety, and long-term durability.
Planning and Design Tips
Start by creating a detailed layout of your bathroom, including fixture locations and plumbing connections. Measure accurately to ensure proper spacing and alignment. Consider the standard dimensions for fixtures like toilets, sinks, and showers to maintain functionality. Use a 3D model or sketch to visualize the design. Always refer to local plumbing codes for compliance. Plan for future accessibility and durability by selecting high-quality materials; A well-thought-out design prevents costly rework and ensures efficient water supply and drainage systems.
Installation Tips for DIY Enthusiasts
Always follow the bathroom plumbing rough-in dimensions guide to ensure accuracy. Use a pipe cutter for clean cuts and PEX tubing for flexibility. Mark wall studs precisely before drilling. Keep pipes level and plumb using a spirit level. Avoid overtightening fittings to prevent cracking. Test water and drain systems before finishing. Practice on scrap materials to build confidence. Consider consulting a professional if unsure about complex connections. Proper installation saves time and prevents future leaks or damage.

Tools and Materials for Bathroom Plumbing
Essential tools include pipe cutters, tubing benders, and drain augers. Materials like PEX tubing, copper pipes, and PVC fittings ensure durability and proper connections.
Essential Tools for Rough-In Installation
Key tools for bathroom plumbing rough-in include a pipe cutter for precise tubing cuts, a tubing bender for creating accurate angles, and a drain auger for clearing clogs. A tape measure ensures accurate dimensioning, while a marker helps label pipes. Adjustable pliers and wrenches facilitate secure connections. A level guarantees proper alignment, and a drill is necessary for making holes in studs. These tools streamline the installation process, ensuring adherence to bathroom plumbing rough-in dimensions.
Recommended Materials for Durability
Durable materials are crucial for bathroom plumbing rough-in. PEX tubing is ideal for water supply lines due to its flexibility and resistance to leaks. Copper pipes are long-lasting and suitable for both hot and cold water. PVC or ABS pipes are recommended for drain lines, offering resistance to corrosion and chemicals. Brass or stainless steel fittings ensure secure connections. Use water-resistant adhesives and sealants for leaks prevention. These materials ensure a reliable and long-lasting plumbing system.
Final Inspection and Testing
Ensure all pipes are properly connected and meet local codes. Check for leaks by pressurizing the system. Verify correct installation of fixtures and drains.
Checklist for Rough-In Inspection
A thorough inspection ensures all plumbing components are correctly installed. Verify that pipes are properly sized, connected, and aligned. Check vent pipes for correct height and placement. Ensure drain traps are installed and functioning. Inspect water supply lines for leaks and proper shut-off valve installation. Confirm all fixtures are correctly positioned and meet local plumbing codes. Test the system under pressure to identify any hidden leaks or issues. This checklist ensures compliance and avoids costly rework. Proper pipe sizing prevents flow issues.
Testing Plumbing Systems Before Finishing
Testing plumbing systems before finishing ensures functionality and safety. Conduct a pressure test on water supply lines to detect leaks. Inspect drain lines for proper flow and vent pipe operation. Verify that all fixtures are connected correctly and water flows in the right direction. Test drain traps for sealing integrity to prevent sewer gases. Address any issues before installing finishes to avoid costly repairs later. This step ensures reliability and compliance with plumbing codes; Proper testing prevents future headaches.
Accurate bathroom plumbing rough-in dimensions ensure functionality, safety, and compliance with codes. Proper planning and execution prevent costly repairs and enhance overall bathroom efficiency and aesthetics.
Understanding bathroom plumbing rough-in dimensions is crucial for successful installations. Key considerations include standard fixture dimensions, proper material selection, and adherence to local codes. Accurate measurements ensure functionality and safety. Planning and design must account for spacing, clearance, and optimal water distribution. Common mistakes, like incorrect pipe sizing, can lead to costly repairs. Following best practices and conducting thorough inspections ensure a durable and efficient plumbing system. Proper execution enhances both functionality and aesthetic appeal in bathroom designs.
Final Tips for Successful Bathroom Plumbing
For a flawless bathroom plumbing rough-in, prioritize precision in measurements and adherence to local codes. Double-check all connections and ensure proper alignment of fixtures. Use high-quality materials to prevent leaks and corrosion. Plan for future accessibility and maintenance when laying out pipes. Regularly inspect work during installation to catch potential issues early. Consider consulting professionals for complex tasks to avoid costly mistakes. A well-executed rough-in ensures long-lasting functionality, safety, and aesthetic appeal in your bathroom design.