
Aperture, Shutter Speed, and ISO Chart: A Comprehensive Guide
Navigating photographic exposure requires understanding the interplay of aperture, shutter speed, and ISO. Resources like Pretty Presets offer cheat sheets,
while MasterClass details modes like Aperture Priority.
Understanding the Exposure Triangle
The exposure triangle represents the fundamental relationship between aperture, shutter speed, and ISO – three settings that collectively determine the brightness, or exposure, of your photographs. Mastering this triangle is crucial for moving beyond automatic modes and gaining full creative control. As Reddit’s r/AskPhotography highlights, understanding how these elements interact empowers photographers to manually adjust their cameras for optimal results.
Each component influences the others; altering one necessitates adjustments to the remaining settings to maintain a balanced exposure. For instance, Iceland Photo Tours explains that increasing ISO from 100 to 200 equates to a one-stop increase in exposure, similar to adjusting shutter speed or aperture. This interconnectedness is why a comprehensive chart, often available as a PDF resource, is invaluable for visualizing these relationships.
The goal isn’t simply achieving a ‘correct’ exposure, but rather using these settings intentionally to achieve a desired aesthetic. Whether prioritizing depth of field with aperture, capturing motion with shutter speed, or managing image noise with ISO, the exposure triangle provides the tools for artistic expression.
What is Aperture?
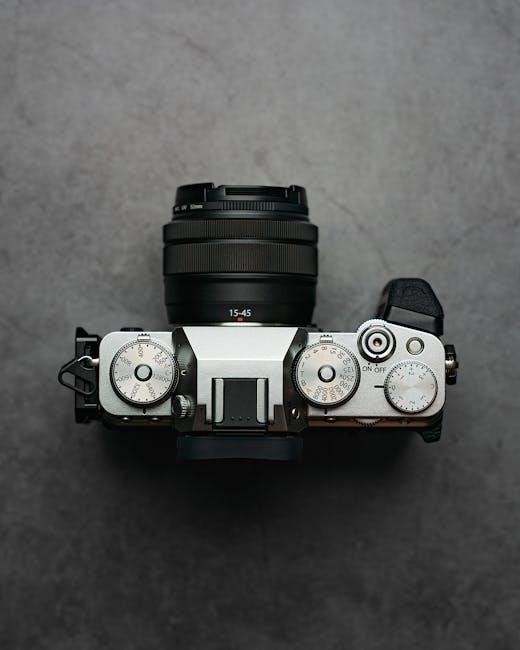
Aperture refers to the opening within a camera lens that controls the amount of light reaching the sensor. It’s measured in f-stops (like f/2, f/8, f/16), with lower numbers indicating a wider opening and more light, and higher numbers signifying a narrower opening and less light. Pretty Presets demonstrates this by mentioning setting an aperture to f/2 for a blurred background.
Beyond light control, aperture profoundly impacts depth of field – the area of your image that appears sharp. A wide aperture (low f-stop) creates a shallow depth of field, ideal for isolating subjects with a blurred background, while a narrow aperture (high f-stop) yields a greater depth of field, keeping more of the scene in focus.
Understanding aperture is key to creative control. Charts and PDF guides often visually represent the relationship between f-stops and depth of field. Mastering aperture allows photographers to dictate what is in focus, drawing the viewer’s eye and shaping the narrative of the image. It’s a foundational element within the broader exposure triangle.
Aperture and Depth of Field
The relationship between aperture and depth of field is fundamental to photographic control. Aperture, expressed in f-stops, directly dictates how much of your image appears acceptably sharp. A smaller f-number (e.g., f/1.8, f/2.8) creates a shallow depth of field, blurring the background and isolating the subject – as illustrated by Pretty Presets’ example of using f/2 for background blur.
Conversely, a larger f-number (e.g., f/8, f/16) results in a large or deep depth of field, bringing more of the scene into focus, from foreground to background. This is useful for landscapes or group portraits where sharpness throughout the image is desired.
PDF resources and exposure charts often visually demonstrate this inverse relationship. Understanding this connection empowers photographers to creatively manipulate focus, guiding the viewer’s eye and emphasizing specific elements within the frame. Mastering aperture allows for intentional control over the visual storytelling within each photograph, shaping perception and impact.
Aperture Values (f-stops) Explained
F-stops represent the ratio of the lens’s focal length to the diameter of the aperture opening. This seemingly complex number directly impacts the amount of light reaching the camera sensor. Each step in f-stop value represents a doubling or halving of light. For instance, moving from f/2.8 to f/4 halves the light, while f/2 to f/2.8 doubles it.
Common f-stop values follow a standardized sequence: f/1.4, f/2, f/2.8, f/4, f/5.6, f/8, f/11, f/16, f/22, and beyond. Smaller numbers signify wider apertures, letting in more light and creating shallower depth of field. Larger numbers indicate narrower apertures, reducing light intake and increasing depth of field.
Exposure charts, often available as PDFs, visually map these values and their corresponding light transmission. Understanding this progression is crucial for manual control and achieving proper exposure. The Exposure Triangle resources emphasize that a change of one stop (e.g., from f/8 to f/11) alters the exposure significantly, requiring adjustments to shutter speed or ISO to maintain balance.
What is Shutter Speed?
Shutter speed defines the duration the camera’s sensor is exposed to light. Measured in seconds or fractions of a second (e.g., 1/200s, 1s, 5s), it’s a fundamental element in controlling both exposure and motion depiction; A faster shutter speed – like 1/1000s – freezes motion, ideal for sports or wildlife photography. Conversely, a slower shutter speed – such as 1/30s or longer – allows motion blur, useful for conveying movement or creating artistic effects.
The relationship between shutter speed and exposure is direct: longer exposure times result in brighter images, while shorter times yield darker images. Exposure charts, often found as downloadable PDFs, illustrate how shutter speed interacts with aperture and ISO to achieve correct exposure.
MasterClass highlights that the camera automatically selects shutter speed in Aperture Priority mode, while the photographer controls it directly in Shutter Priority. Understanding these settings, and how they affect the final image, is key to mastering photography, as detailed by resources like Reddit’s r/AskPhotography.
Shutter Speed and Motion
Shutter speed’s impact on portraying motion is significant. Fast shutter speeds – think 1/500s or faster – effectively “freeze” action, capturing sharp images of moving subjects. This is crucial for photographing sports, birds in flight, or any fast-paced event. Conversely, slower shutter speeds introduce motion blur, creating a sense of movement and speed. This technique is often used artistically to depict flowing water, light trails, or the dynamism of a running figure.
The degree of blur depends on both the shutter speed and the subject’s speed. Resources like exposure charts (often available as PDFs) visually demonstrate this relationship. Understanding how to manipulate shutter speed to control motion is a core skill for photographers.
Reddit’s r/AskPhotography emphasizes that mastering shutter speed allows photographers to “take charge” of capturing motion effectively. The interplay with aperture and ISO, as highlighted in various guides, is essential for achieving the desired effect, balancing sharpness and blur to tell a compelling story.
Shutter Speed Values Explained
Shutter speed is measured in seconds or fractions of a second, ranging from very long exposures (e;g., 30 seconds) to incredibly fast ones (e.g., 1/8000s). Common values follow a doubling or halving sequence: 1, 1/2, 1/4, 1/8, 1/15, 1/30, 1/60, 1/125, 1/250, 1/500, 1/1000, and so on. Each step represents a one-stop increase or decrease in exposure.
A shutter speed of 1/60s is often considered a baseline for handheld shooting, minimizing camera shake. Slower speeds generally require a tripod to avoid blur. Faster speeds are ideal for freezing motion. Exposure charts, frequently found as downloadable PDFs, visually illustrate these values and their corresponding effects.
Iceland Photo Tours notes that increasing shutter speed from 1/60s to 1/30s increases exposure by one stop. Understanding these values and their relationship to the exposure triangle, as discussed on MasterClass, is crucial for manual control and achieving desired photographic results.
What is ISO?
ISO measures the sensitivity of your camera’s sensor to light. A lower ISO, like 100, means the sensor is less sensitive and requires more light, resulting in cleaner images. Higher ISO settings, such as 800, 1600, or 3200, increase sensitivity, allowing you to shoot in darker conditions.
However, increasing ISO comes with a trade-off: image noise or grain. The Reddit r/AskPhotography community emphasizes that mastering ISO, alongside aperture and shutter speed, is key to manual control. Exposure triangle charts, often available as PDF downloads, demonstrate how ISO impacts overall exposure.
Pretty Presets highlights the importance of balancing ISO with other settings. Maintaining a low ISO (like 100) when sufficient light is available is ideal for optimal image quality. Understanding the relationship between ISO values and their effect on noise is vital for informed photographic decisions.
ISO and Image Noise
Increasing the ISO setting amplifies the signal from your camera’s sensor, but it also amplifies noise. This noise manifests as graininess or speckling in your images, reducing clarity and detail. The higher the ISO, the more noticeable the noise becomes.
While modern cameras handle high ISOs better than older models, noise is an inherent consequence of boosting sensitivity. Resources like exposure triangle charts (often found as PDFs) visually demonstrate this trade-off. The MasterClass article explains that understanding this relationship is crucial for making informed exposure choices.
The r/AskPhotography community on Reddit stresses that fully controlling your camera means knowing when to accept some noise to achieve a properly exposed image in low light. Balancing ISO with aperture and shutter speed is key to minimizing noise while capturing the desired shot. Careful consideration of ISO values is essential for image quality.
ISO Values and Their Impact
ISO values represent the sensitivity of your camera’s sensor to light. Common base ISOs are 100 or 200, offering the cleanest images with minimal noise. Doubling the ISO (e.g., from 100 to 200, or 200 to 400) increases sensitivity by one “stop,” effectively brightening the image.
Iceland Photo Tours highlights that increasing ISO by one stop is equivalent to adjusting shutter speed or aperture by one stop. Exposure charts, often available as PDFs, visually illustrate these relationships. However, each doubling of ISO introduces more noise.
Higher ISOs like 800, 1600, 3200, and beyond are used in low-light situations, but at the cost of image quality. The Reddit r/AskPhotography forum emphasizes that understanding the impact of ISO is vital for manual control. Choosing the lowest possible ISO for the given conditions is generally recommended to maintain optimal image clarity and detail.
The Relationship Between Aperture, Shutter Speed, and ISO
Aperture, shutter speed, and ISO form the “exposure triangle,” a fundamental concept in photography. They are interconnected; altering one necessitates adjusting others to maintain proper exposure. The MasterClass resource explains this dynamic, emphasizing that changing one setting impacts the others.
For instance, if you increase your aperture (lower f-stop) to let in more light, you might need to increase shutter speed to avoid overexposure, or lower ISO to maintain image quality. Iceland Photo Tours clarifies that a one-stop change in any setting—aperture, shutter speed, or ISO—results in the same exposure adjustment.
Exposure charts, often found as downloadable PDFs, visually represent these relationships. Understanding this interplay allows photographers to creatively control depth of field, motion blur, and image noise. The r/AskPhotography community on Reddit stresses that mastering this triangle is key to taking full control of your camera and achieving desired photographic results.
Exposure Stops: A Key Concept
Exposure stops represent a doubling or halving of light reaching the camera sensor. Understanding stops is crucial for precisely controlling exposure and creatively manipulating images. Iceland Photo Tours highlights that increasing ISO from 100 to 200, or shutter speed from 1/60th to 1/30th, each represents a one-stop increase in exposure, effectively doubling the light.
Similarly, changing aperture from f/11 to f/8 also increases exposure by one stop. These changes are cumulative; a two-stop increase doubles the light twice, resulting in four times the original amount. Exposure charts, often available as PDFs, visually demonstrate these relationships, making it easier to grasp the impact of each adjustment.
Mastering exposure stops allows photographers to move beyond automatic modes and confidently adjust settings in Aperture Priority or Shutter Priority modes. The ability to think in terms of stops, as discussed on Reddit’s r/AskPhotography, is fundamental to achieving consistent and creative results.
Using Aperture Priority Mode
Aperture Priority (Av or A) mode empowers photographers to control depth of field while the camera automatically selects the appropriate shutter speed. This is particularly useful when a specific aesthetic – like a blurred background achieved with a wide aperture (e.g., f/2, as mentioned by Pretty Presets) – is desired. The camera calculates the shutter speed needed for correct exposure based on the chosen aperture and ISO setting.
However, it’s vital to monitor the shutter speed selected by the camera. If the speed becomes too slow, resulting in potential motion blur, increasing the ISO may be necessary. Exposure charts, often found as downloadable PDFs, can help visualize the relationship between aperture, shutter speed, and ISO in this mode.
MasterClass emphasizes that Aperture Priority is ideal when depth of field is the primary creative concern. Understanding how the camera responds in this mode, and being prepared to adjust ISO accordingly, is key to successful shooting.
Using Shutter Priority Mode
Shutter Priority (Tv or S) mode allows photographers to dictate the duration the camera’s sensor is exposed to light, while the camera automatically adjusts the aperture to achieve proper exposure. This mode excels when capturing motion – either freezing it with a fast shutter speed or blurring it to convey movement. Resources like exposure charts (often available as PDFs) illustrate how shutter speed impacts aperture settings.
As with Aperture Priority, monitoring the aperture selected by the camera is crucial. A very narrow aperture (high f-number) might be chosen in bright conditions, potentially leading to increased diffraction and reduced sharpness. Adjusting the ISO can help maintain a reasonable aperture value.
MasterClass highlights the utility of Shutter Priority when controlling motion is paramount. Understanding the interplay between shutter speed, aperture, and ISO, and utilizing a reference chart, ensures creative control and technically sound images.
Practical Examples: Combining Settings
Let’s explore scenarios combining aperture, shutter speed, and ISO. For a portrait with a blurred background (bokeh), prioritize a wide aperture like f/2.8. If shooting in bright sunlight, a fast shutter speed (e.g., 1/250s) and low ISO (100) will be suitable. Conversely, in low light, you might need to increase ISO (e.g., 800 or higher) and use a slower shutter speed – potentially requiring a tripod to avoid blur.
Consider sports photography: freezing action demands a fast shutter speed (1/500s or faster). This often necessitates a wider aperture and potentially higher ISO. Exposure charts, frequently found as downloadable PDFs, visually demonstrate these relationships.
Remember, increasing ISO introduces noise. Balancing image quality with the need for a fast shutter speed and desired depth of field is key. Regularly consulting an aperture, shutter speed, and ISO chart will refine your understanding and improve your results.
Creating Your Own Exposure Chart (PDF Resources)
Developing a personalized exposure chart enhances your photographic workflow. While numerous pre-made charts are available as PDFs – Pretty Presets notably offers a free cheat sheet – crafting your own allows for tailored learning. Begin by listing common aperture values (f/2.8, f/5.6, f/8, etc.), corresponding shutter speeds (1/60s, 1/125s, 1/250s, etc.), and ISO levels (100, 200, 400, 800, etc.).
Document how changing each setting impacts exposure, noting one-stop increments. For instance, doubling the ISO or halving the shutter speed increases exposure by one stop. Include notes on the effects of each setting – depth of field for aperture, motion blur for shutter speed, and noise for ISO.
Online resources and photography communities often share customizable chart templates; Regularly updating your chart based on practical experience solidifies your understanding of the exposure triangle and improves your ability to quickly assess and adjust camera settings in diverse shooting conditions.
Common Photography Scenarios and Settings
Adapting to diverse shooting situations requires understanding optimal exposure settings. For portraits with blurred backgrounds, prioritize a wide aperture (f/2.8 ⏤ f/5.6) and a corresponding shutter speed to maintain proper exposure, typically starting around 1/60s, adjusting ISO as needed. Landscape photography benefits from a narrower aperture (f/8 ⏤ f/16) for greater depth of field, often paired with a lower ISO (100-200) and a slower shutter speed, potentially requiring a tripod.
Action photography demands a fast shutter speed (1/250s or faster) to freeze motion, potentially necessitating a wider aperture and higher ISO to compensate for reduced light. Low-light scenarios often require increasing ISO, but be mindful of potential image noise.
Referencing a comprehensive exposure chart – whether pre-made or self-created – provides a valuable starting point. Remember that these are guidelines; the ideal settings depend on your creative vision and the specific lighting conditions. Experimentation and practice are key to mastering exposure.